Fuses are designed to stop an excessive current flow, which can damage equipment or overheat circuits. We will cover fuse removal and inspection as well as testing the multimeter.
- What tools and equipment are needed?
- Flashlight (traditional and LED)
- Small flathead screwdriver
- Fuse pulling tool or needle-nosed pliers
- Test light or multimeter/voltmeter
- Replace fuses if necessary
Fuses are used to stop excessive current flow, which can damage equipment or cause a fire. In order to account for electrical surges and spikes, vehicle designers specify fuses that have amp ratings twice as high as the normal current flow of a circuit. This article will show you how to remove these fuses, inspect them, and test them using electrical testing equipment.
Check the fuse of the circuit where the electrical component is not working. A conductive metal strip is placed in the middle of a fuse when it is unable to handle all the electricity.
Common Fuses
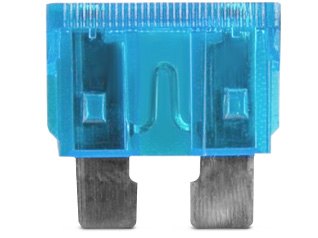
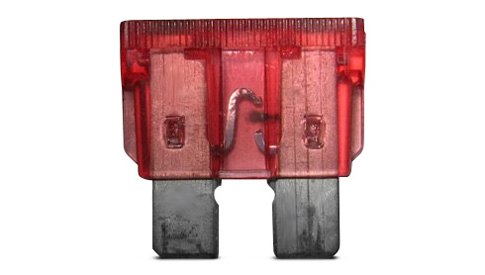
In automotive applications, "Blade" fuse are common. The fuse will look unbroken if it has a conductive metal strip (horseshoe shaped) running through the outer housing.
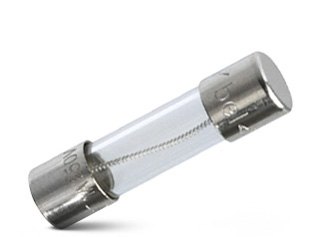
Some automotive applications use cylindrical "glass" fuse shapes. The fuses are also known as Buss fuses after the Buss manufacturer. A conductive metal strip runs through the middle and appears unbroken if they are in good condition.
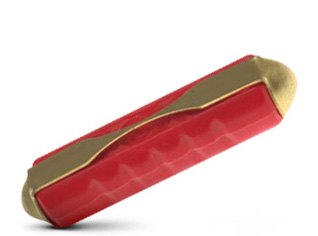
In older European cars, "ceramic" fuse pieces are often used. They have an outer surface of metal or copper that surrounds the ceramic support piece. When the fuse is blown, the narrow copper piece will crack in the middle.
Visually Inspecting a Fuse
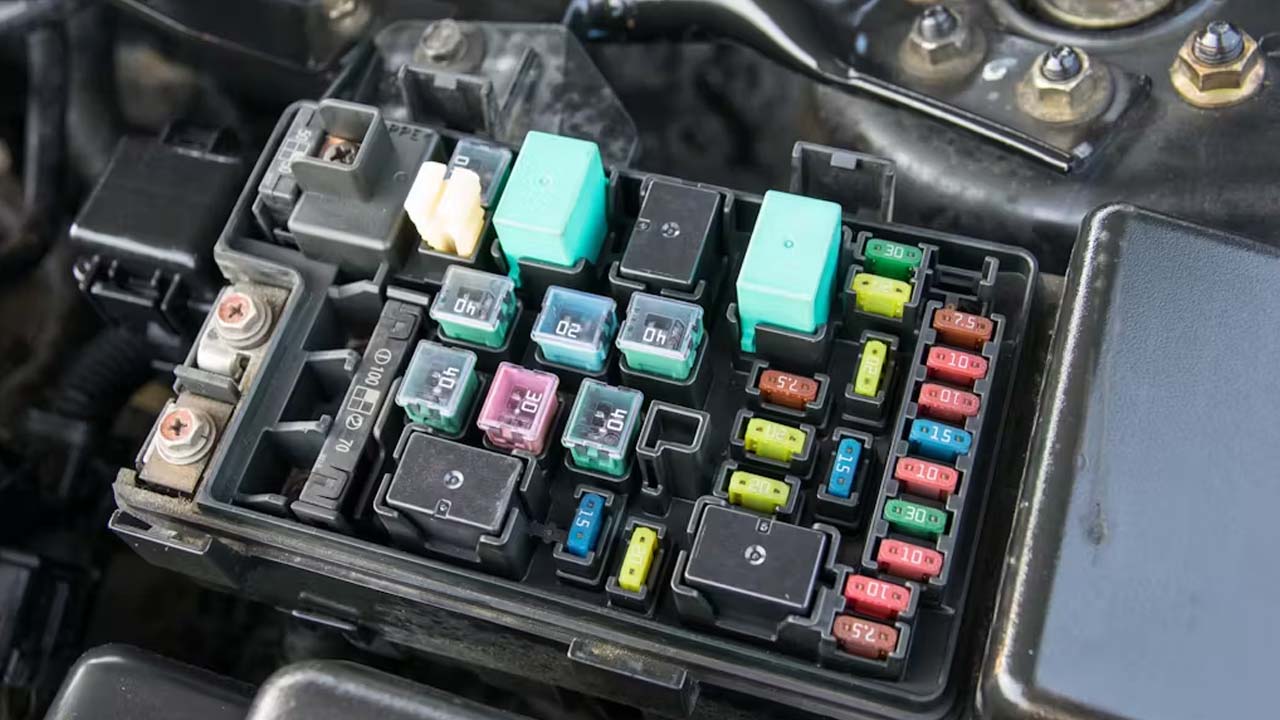
Locate the fuse box using the owner's guide. You can find the location of the fuses if you do not have the owner's guide. A quick internet search, or a call to the manufacturer will provide the necessary information. Many vehicles have fuses arranged behind a panel underneath the dashboard or on the side of the dashboard that is covered by the driver door when the door is closed.
Other makes and models may have fuses in a small box located under the hood. The cover of fuse panels and fuseboxes may be removed with a flathead screwdriver. You'll see a diagram on the back of the piece that shows the location of each fuse. This will help you locate the one you want to check.

Fuse ratings are clearly marked on all fuses, regardless of their design. Remove the fuse physically using a small fuse puller. The tool is used to clamp the outer edge of the fuse, which you can see. This tool is included by some automakers in the fuse box.
If you can't find a fuse-pulling tool, you can use a pair of needle-nose pliers to provide the grip and maneuverability you need. A pair of needle-nosed pliers can be used if you do not have a tool for pulling fuses. They will give you the grip and maneuverability that is needed. Be careful not to "short" a circuit by touching the metal portion of the pliers.
When the fuse has been removed, check the metal wire inside. If the metal strip is visibly damaged, it means that the fuse needs to be changed. Install a fuse of the same amperage - the vehicle manufacturer usually provides extras on the fuse panel. It is not acceptable to use a fuse with a higher or lower amp rating.
Although bad fuses can be easily identified by their appearance, do not assume that a fuse will work perfectly even if its metal strip is intact. The opaque plastic cap could hide a fractured strip. To be certain, it is best to test the fuse using an appropriate tool.
Test an Electrical Fuse After It Has Been Removed

A multimeter with continuity or "Ohms", set on, can be used to test a fuse outside the vehicle. The red lead should be placed on one end of the metal fuse, and the black lead at the other end. The multimeter will display a reading of "continuity" or zero resistance (or close to zero) if the fuse is in good condition. No reading is the result of a blown fuse, which is also called an "open-circuit".
Test a fuse without removing it
You can check a fuse while it is still in place with a voltmeter, or even a multimeter that has been set to "V", (Volts). Note! Note! Touch or clamp the black lead while the ignition is on.
You'll find two metal squares on the end cap. These are for testing. The red test lead should be touched to the metal squares on the end cap of the blade fuse. The voltage should be between 12-14 volts. If you see readings on both sides, the fuse is functioning properly. If the fuse is working but the device it controls does not, there is a fault downstream. The fuse will be bad if only one side generates voltage. If neither side gives a reading then there was never any current flowing through the fuse. This indicates an electrical problem that is upstream from the fuse.

Replacing A Fuse
You can test if the fuse has been replaced by gently pressing a new fuse of the same type into the slot. It's normal for fuses to blow, but if it doesn't happen again there is no reason to worry. If the new fuse fails relatively quickly, it will require more electrical diagnosis to find the source of an excessively high current.